Solar wax melter plans
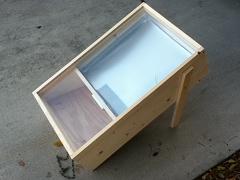
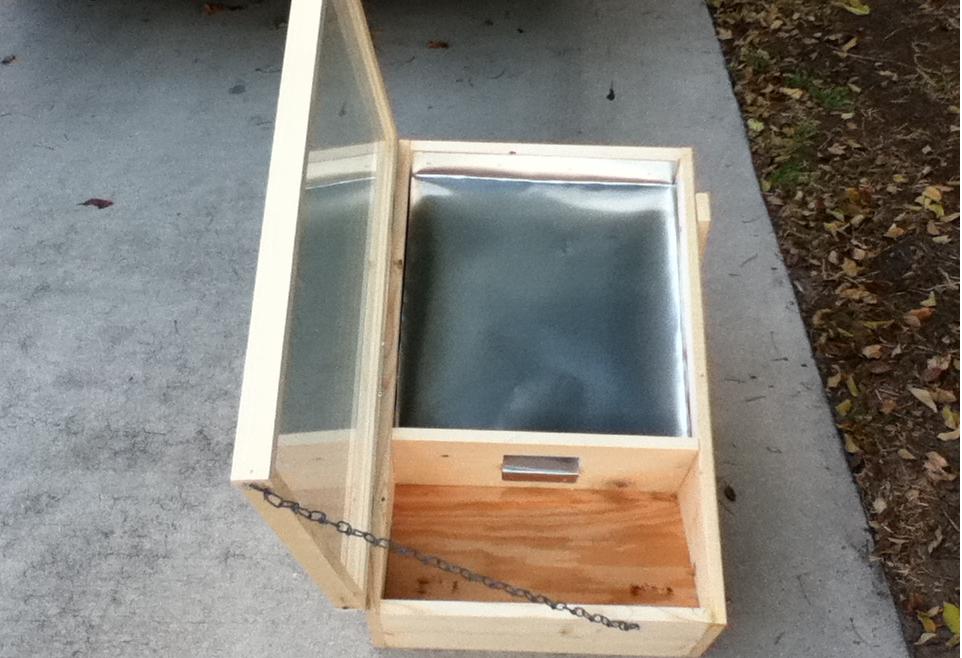
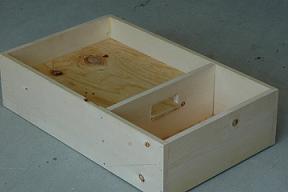
These plans will build a 31x19x9" solar wax melter, which works great to melt cappings and such. It uses a standard 9x13" metal baking pan (a glass one fit ours, but it was kind of tight). The project takes a few hours to complete, depending on how many of the materials you have laying around your garage. These plans were created based upon a workshop that was given for the Palm Beach Beekeeping Association, and later for the SouthEast Organic Beekeepers Association, so we ordered some of the stuff in quantity.
Bill of materials:
For a single unit, you will need:
Lumber:
10' 1x10" lumber (see note below)
1/2" plywood (18x30" or 18x21" - see note below)
Scrap wood for legs (should be one 1x3" peice, cut in half at an angle).
Note: The plywood is used for the bottom, so you will need a 17-1/2x21" peice, plus 17-1/2x10-1/2", which you can use from plywood scrap if you are building multiple units. One sheet of plywood will do 8 units, but a 2'x2' sheet of plywood won't do a single unit.
Fasteners and hardware:
1 box 6d galvanized finishing nails (Home Depot $4.24/1 lb box)
1 box 3d 1-1/4" galvanized finishing nails (Home Depot $3.98/1 lb box) - must be shorter than two thicknesses of wood or they will poke through. Only 6/8 nails per unit are needed.
2" screws for fastening the legs on (only 2 screws per unit are needed)
2-3 medium sized hinges (Home Depot $2.77/pair)
2 pcs 18x30" glass (30x36" is a standard size, Lowes does 1 free cut, Lowes/Home Depot both cost $15.68)
2 rolls 20" flashing (Home Depot $14.55/10' roll) 1 roll will do 5 units
Hardware cloth (1/4" or smaller) - just enought to cover opening
Flat black paint (optional)
Carrying handle (optional) (Home Depot $2.97 ea)
Door shims (optional)
Instructions:
-
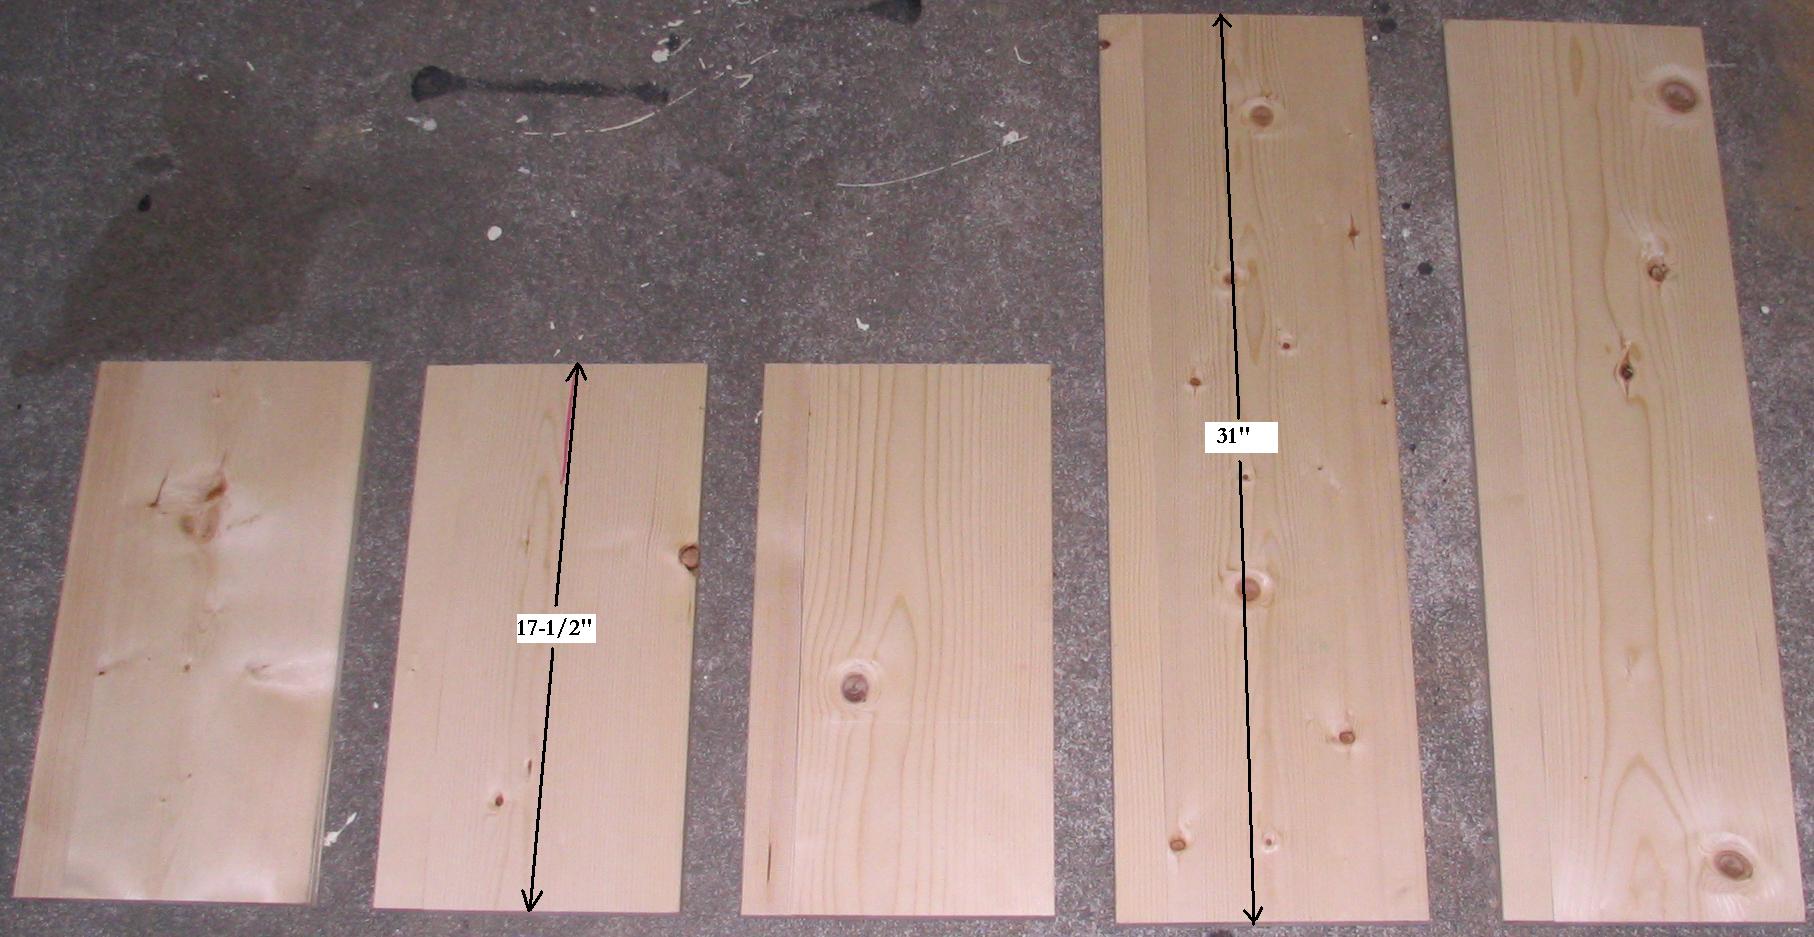
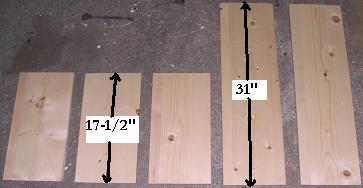
Cross cut the lumber to get:
- 2 - 31" sides
- 3 - 17-1/2" ends + partition
-
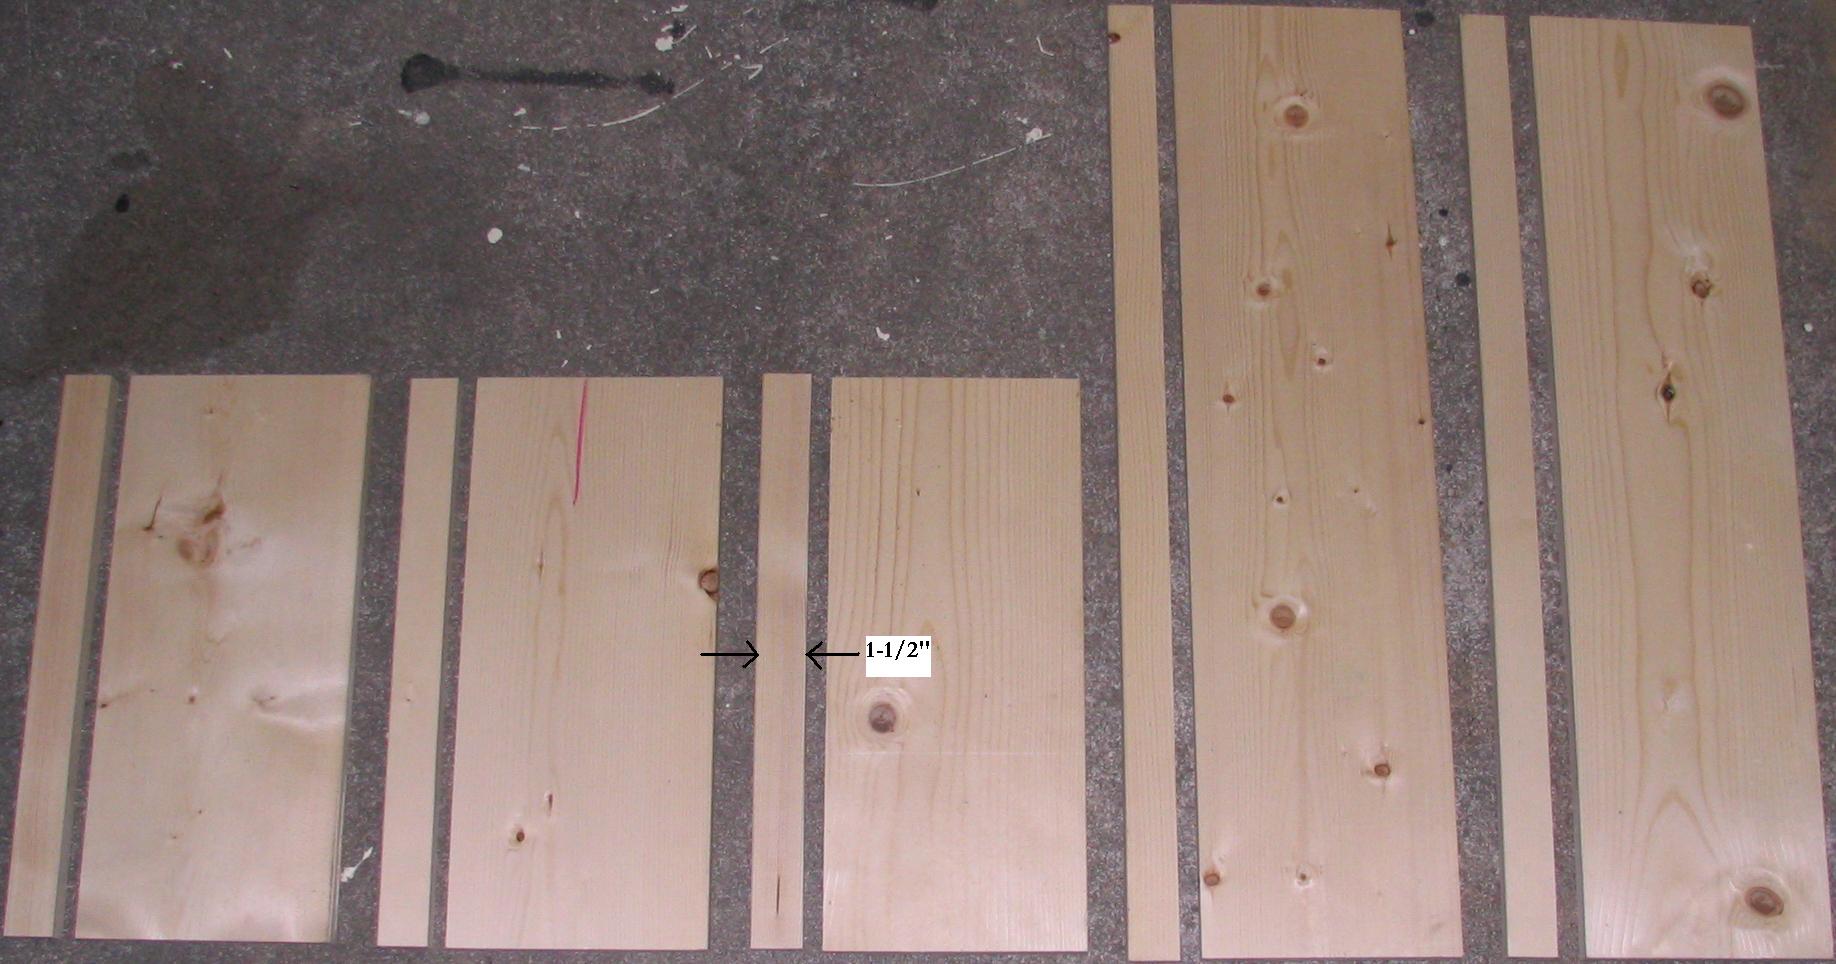
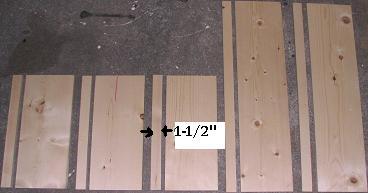
Rip the good edge of the lumber (without knots) to 1-1/2" for the top part. You will have one extra short piece.
-
Rip the extra short piece from above to get two 3/4x3/4" strips. These will be the bottom supports.

-
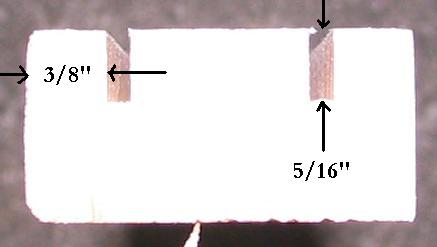
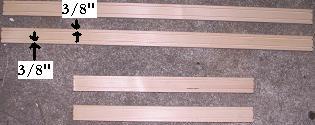
Run two cuts 5/16" deep 3/8" from the edge to cut the slots for the glass on two long peices and two short pieces.

-
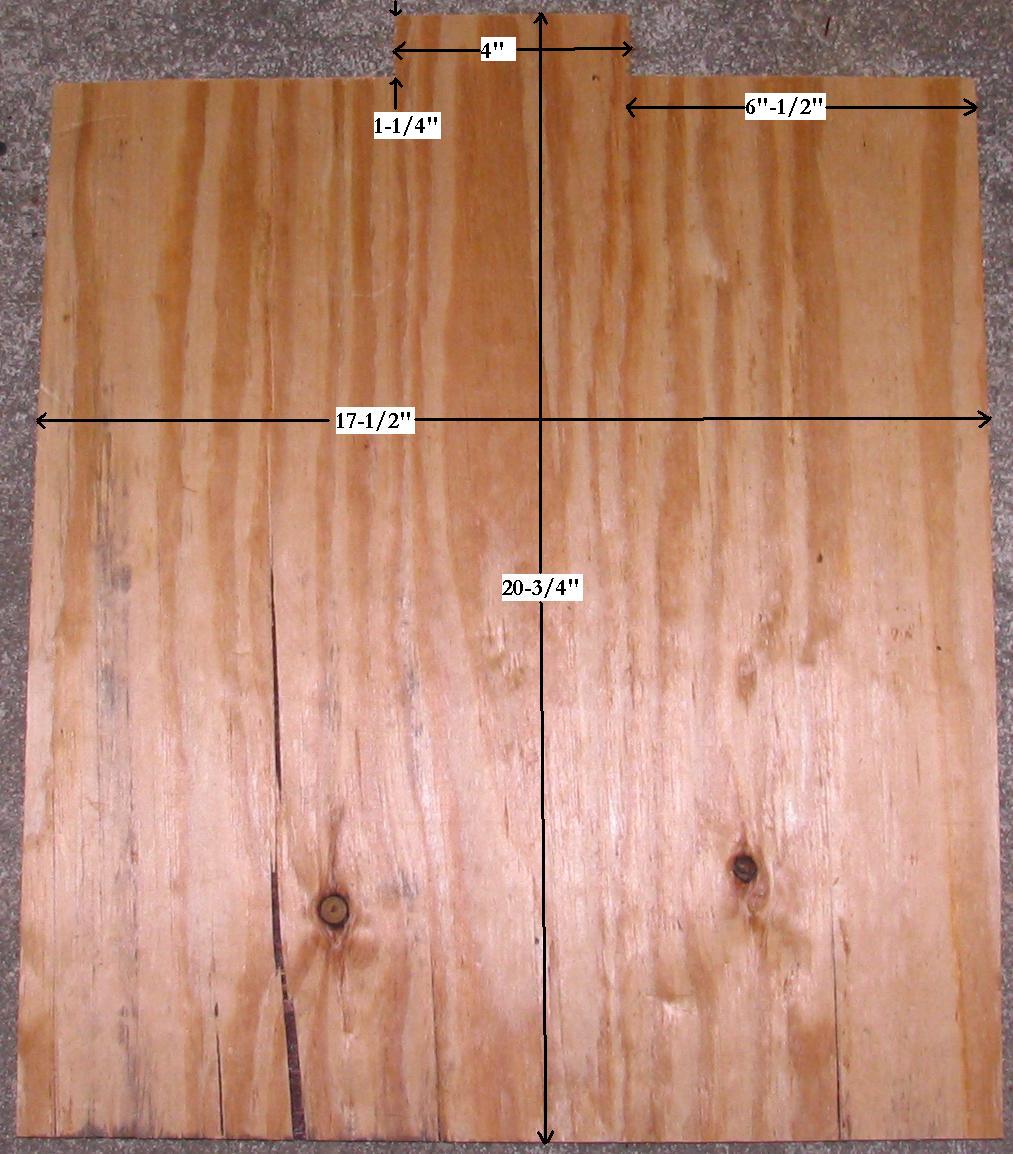
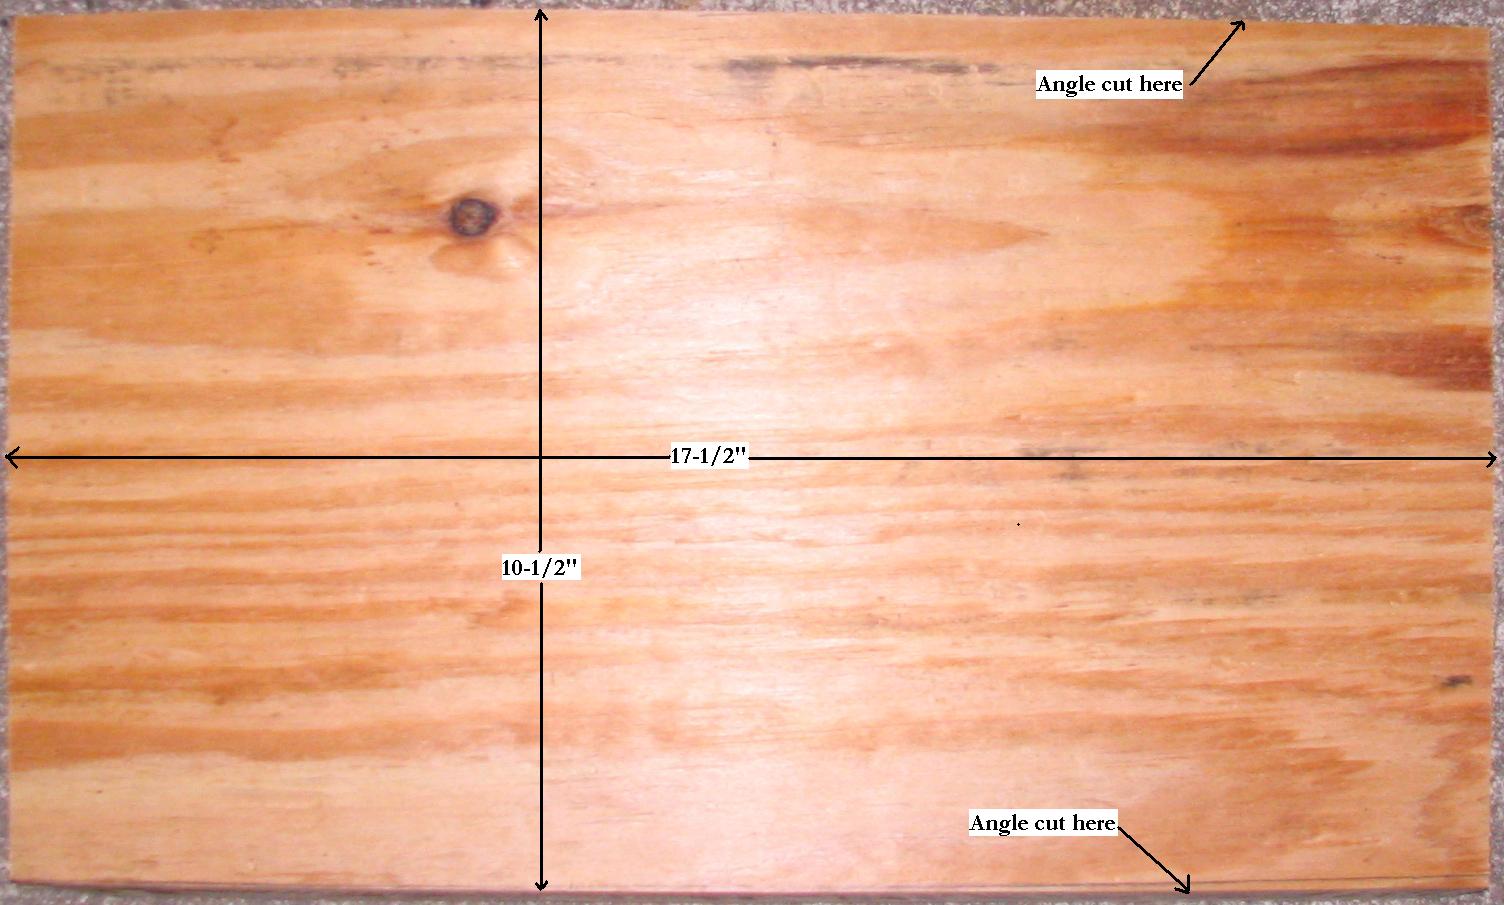
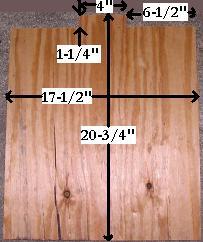
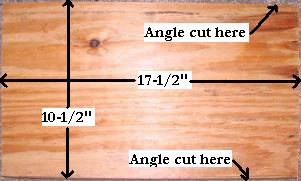
Cut the plywood so you get a 17-1/2x20-3/4" piece.
-
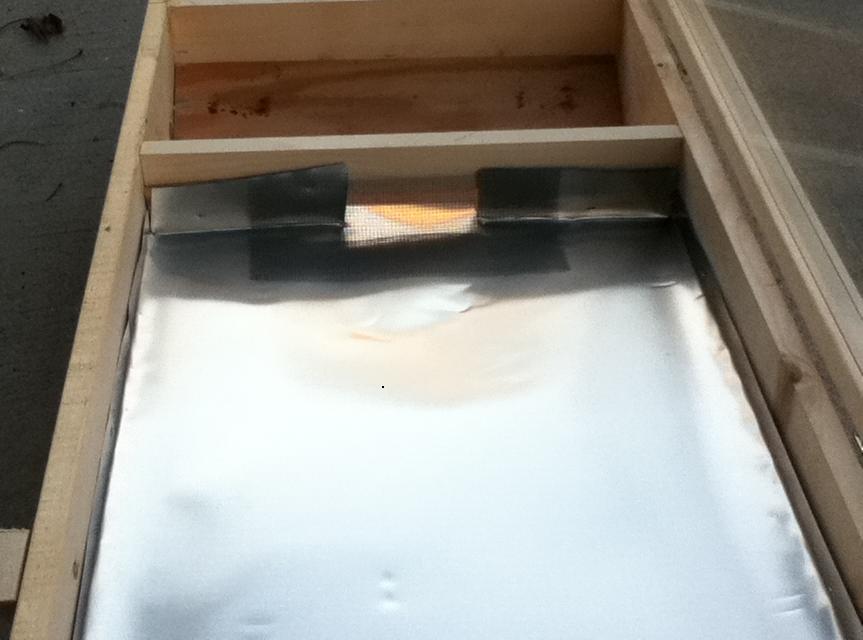
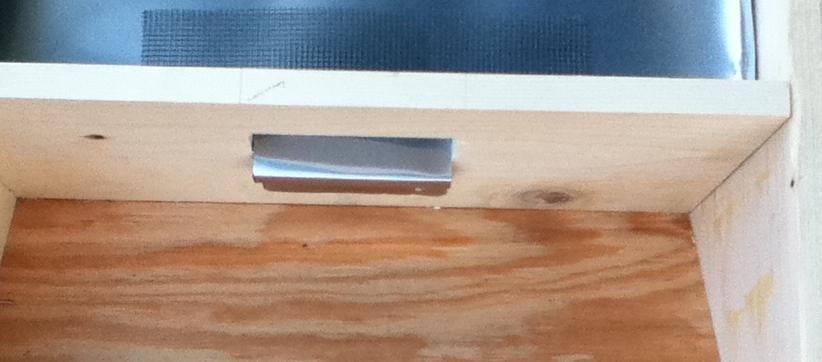
Cut a tab for the wax spout - mark 6-1/2" from each side, and 1-1/4" from the end (the tab should be 4" wide, and centered on the board).
-
Cut the extra short pieces from the 1-1/2" stock above to get two 3/4x3/4" pieces. This is for the support for the wax pan.
-
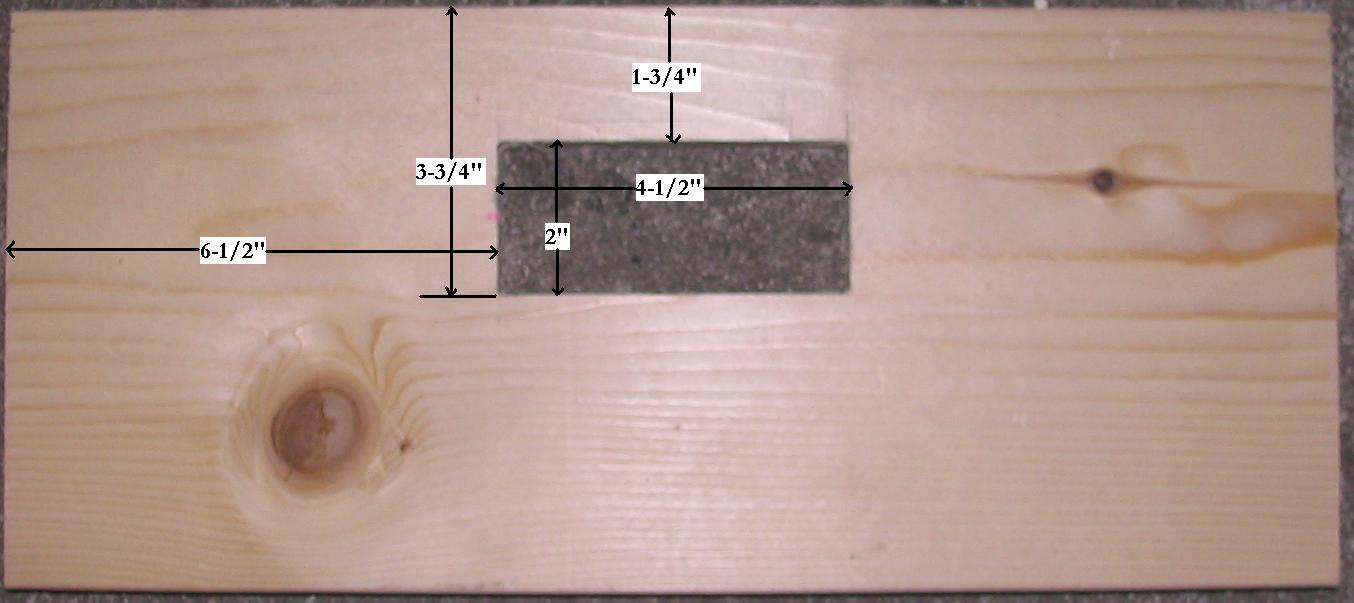
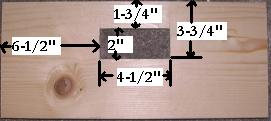
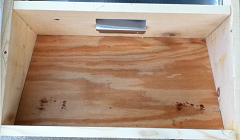
The hard part is the partition - cut a hole 2x4-1/2" into one of the 17-1/2x7-1/2" peices. Measure 1-3/4" from the top, and 3-3/4" from the top, and then 6-1/2" from each side. You can cut this with a jig saw and clean it up later using a router and a jig, if you like nice, smooth edges.
-
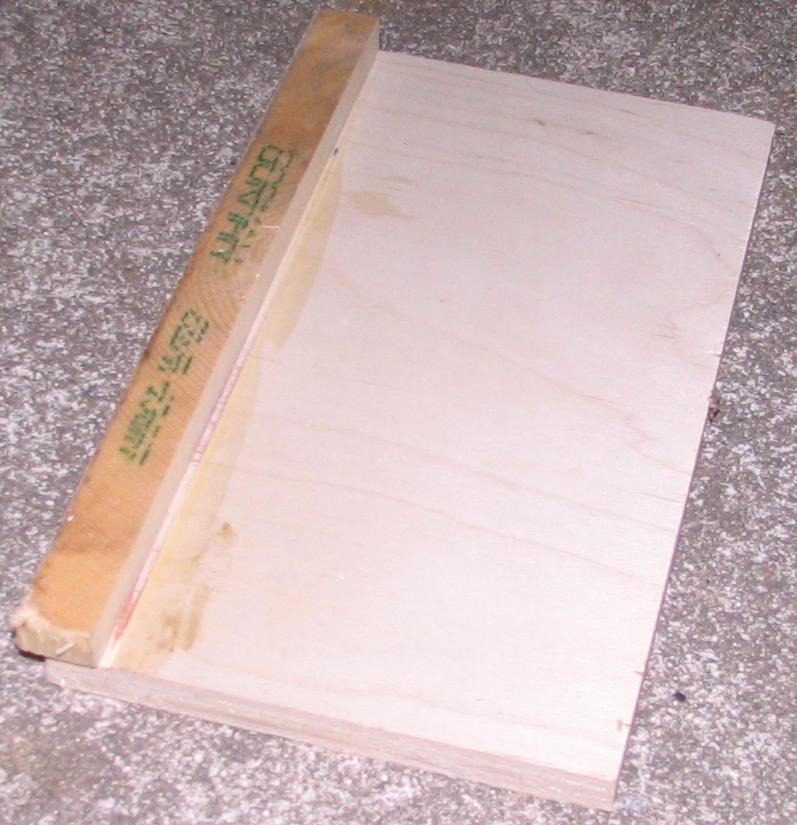
Here is the router jig - very simple. Glue or nail a small strip to some scrap wood and run the router along the inside edge.

-
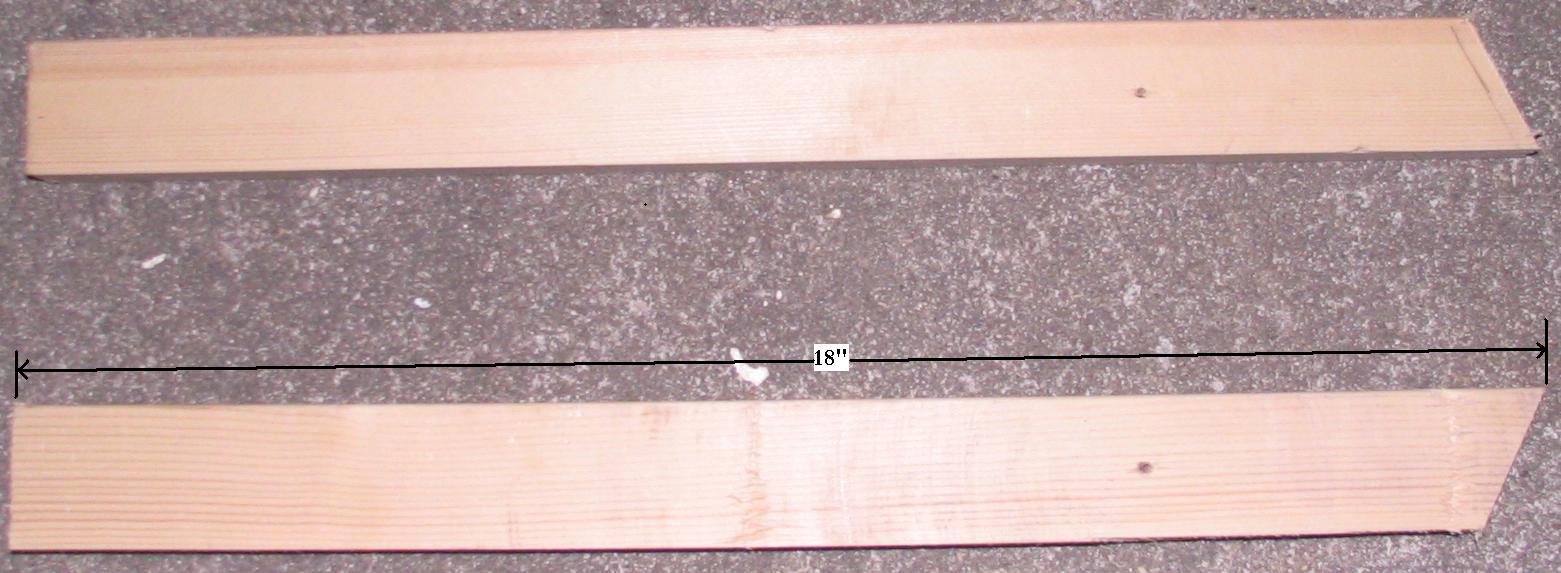
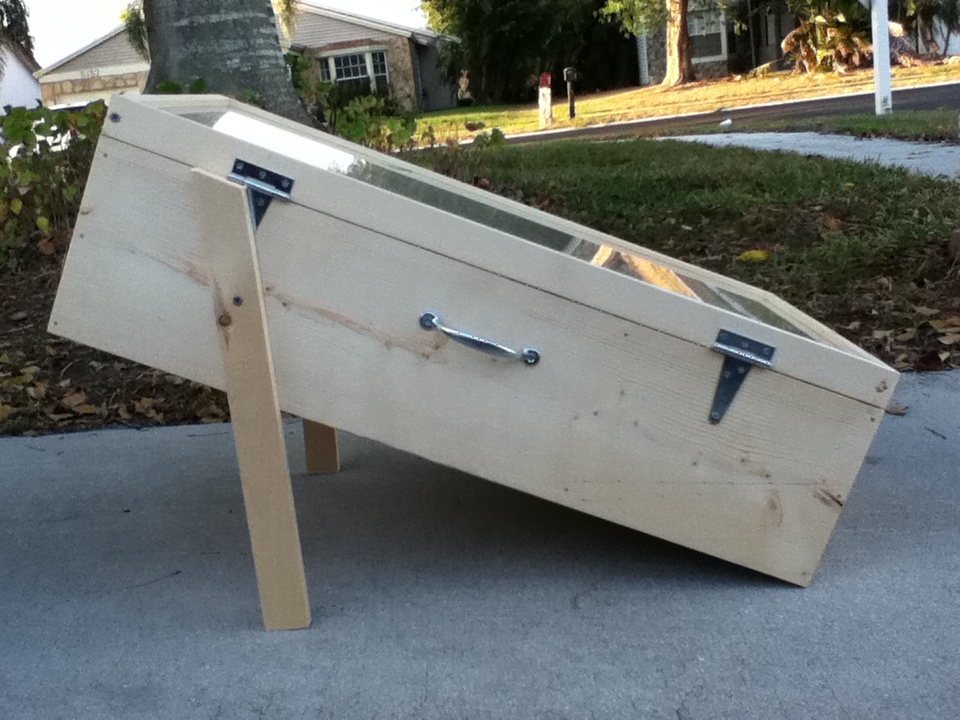
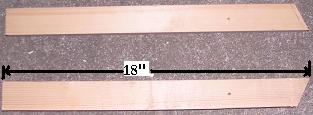
Cut the legs for the box - we ripped a 1x6" into thirds, and made them 18" long.
-
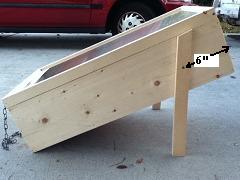
Ok, here is where your local area will be different. Google your home town name, state and "Latitude Longitude". Your latitude will dictate the angle you want to use for optimum solar performance. Here in Jupiter, FL, the latitude is 26.92 degrees N, so we cut all of the angles to 27 degrees.
-
Cut the angle on one end of the legs. Save the little leftover angle block for later - it helps when you assemble the legs to the main body of the box.
-
Ok, the critical piece (aside from the partition), is the bottom part where your pan will sit. Let's assemble everything before cutting things, but the measurement you will need will be 17-1/2 and around 10-1/2" with angles cut on both ends. Let's wait to cut until later. It may vary a bit depending on how square you get the partition in.
-
Nail the outside walls of the box together. Good idea to glue and clamp too - judgement call on your part. You can use a square, but when you install the wax base, it will square it up for you.
-
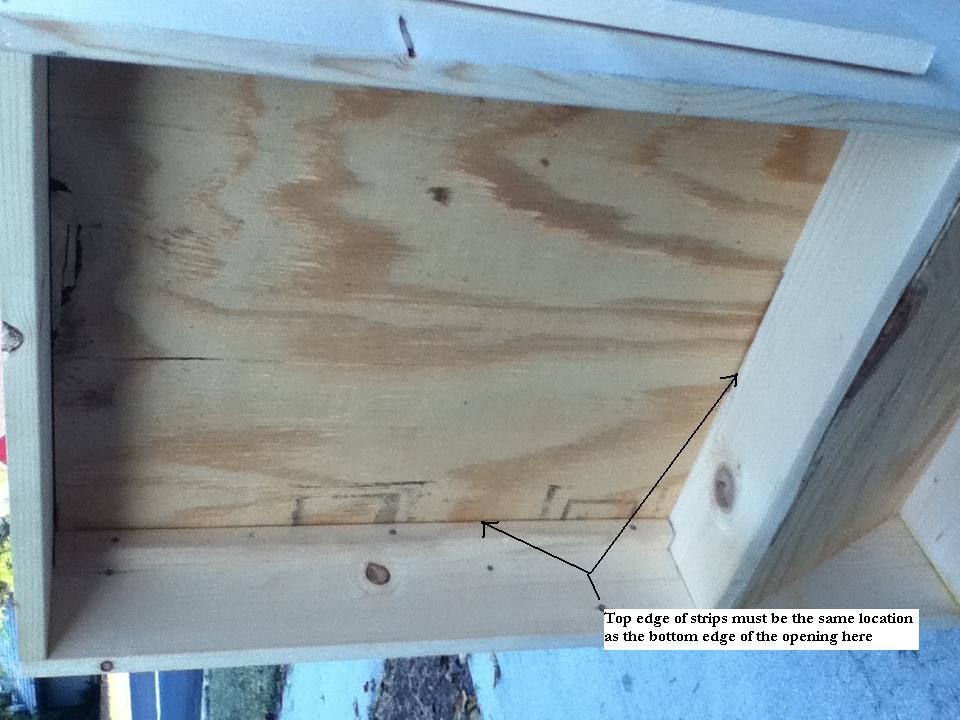
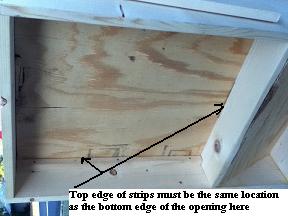
Install the support for the wax pan so that the top edge is 3-3/4" down from the top.
-
Install the partition and wax pan bottom onto the supports. You may nail this in from the side - use thin nails if you do so, and measure very carefully where the bottoms are so you don't miss. You can see in the picture a line where we found the bottom to be.
-
Install the screws for the support legs. Measure from the center of the board, down to where it will intersect with the wax chamber support. You can use a 2" screw here, and it won't poke through if you hit the wax chamber support.
-
Install the legs. Place the wedge under the lower corner, and raise the box up to where it looks about right. The angle part of the leg should be up, and you move it to where the wedge is perfect, and the top angle part is perfectly flush with the top enge of the box. Ours wound up being around 6" from the end (at the center line of the wax chamber support).
-
This is the point where we cut the bottom part for the pan chamber. We cut a 27 degree angle (or whatever your latitude is), and then just checked the fit, and then cut the width as appropriate. Ours wound up being around 10-1/2". If you get the angles right, your collection pan will be level (we used a small level to determine what would be good).

-
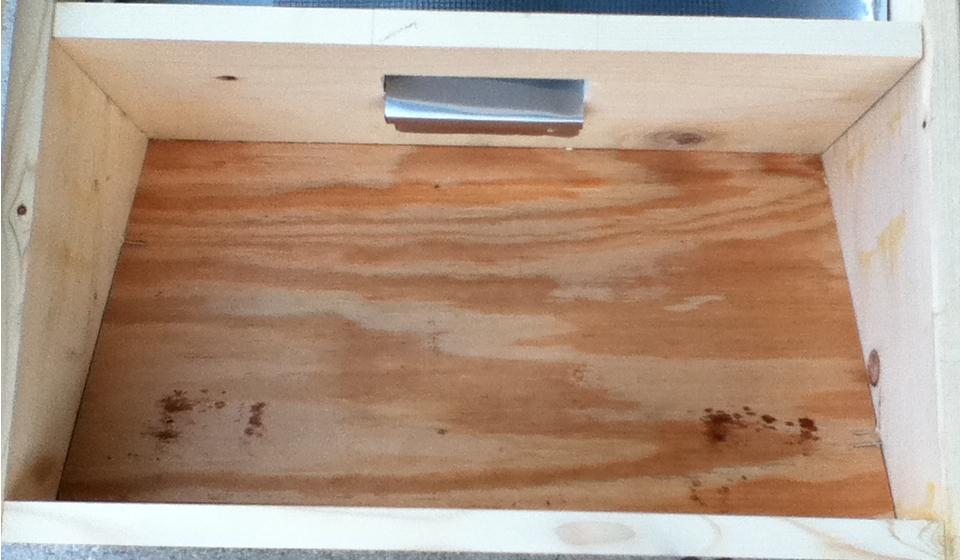
Install the bottom of the collection chamber.
-
Assemble the top. Nail and glue/clamp one end, then screw the other. Be sure to be careful that none of the fasteners go close to the glass, or you will break it and then be unhappy. Install the glass while the glue is wet so that if things aren't exactly square, you can make minor adjustments to get things to go your way.
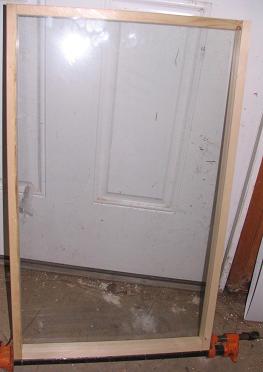
-
Install the hinges, again, taking care to avoid screwing anything too close to the glass. Install the lid to the melter box. Take note of which end of the lid is glued/nailed, and put that end towards the bottom of the melter. This allows you to replace the glass easier, and makes adding a chain possible.
-
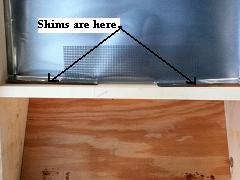
Install the door shim stock onto the partition so as to provide a "funnel" at the bottom of the wax chamber. These will need to be trimmed to length so they don't block the hole. You can just glue it in.
-
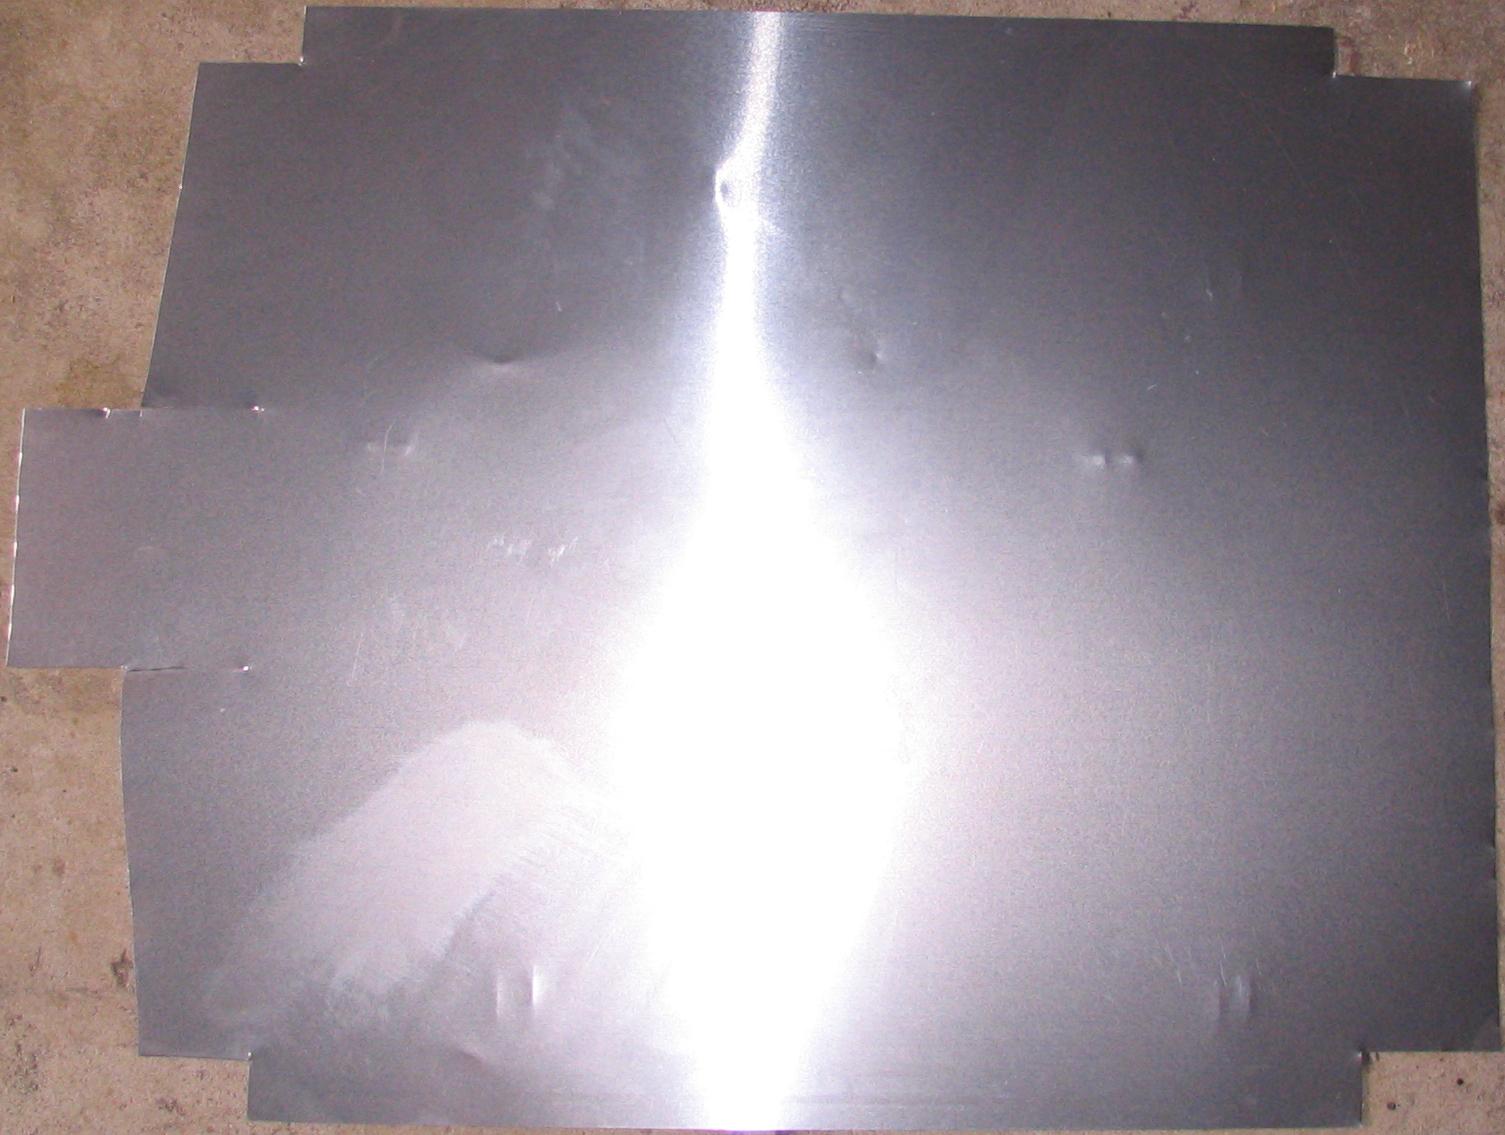
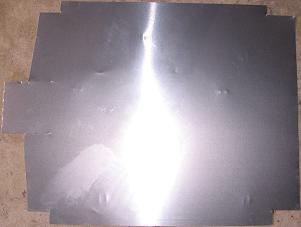
Cut the flashing/pan liner for the wax chamber. Lay the tin flashing over the melter opening and make a pattern for how it should fit.
-
Install the flashing/pan liner using a staple gun. You can just fold the end over and staple it like so under the lip of the opening.


-
Measure the length along the side and mark the half-way point for the handle. If you install along the line where the shelf is, it will have greater strength. Install the handle like so.

-
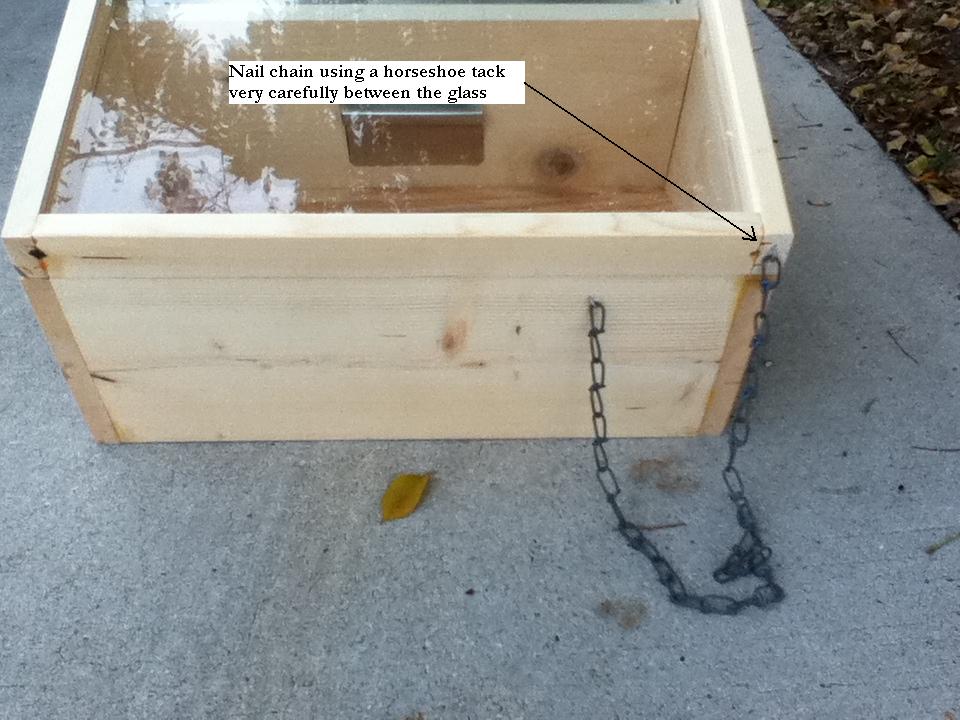
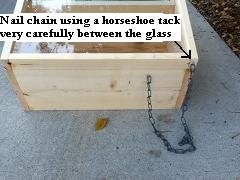
Install a small chain using a horseshoe tack. Be very careful to place the nail where the glass won't be hit.
-
Open the lid and attach the lower side of the chain so that the chain stops the lid when it is just a little past center.

-
Your wax melter is done. Should fit a 9x13" baking pan perfectly.